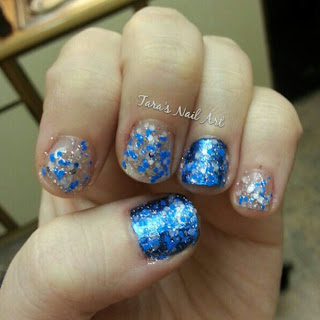
Sunday, December 30, 2012

ACNC Day 24: Recreate A Holiday Mani

Hey everyone

We've reached the end of the challenge. I'm so happy that I actually started and finished a challenge. It was super hard to do at times with my little one and having to paint every day. Especially while I work full time and had Christmas crap to do. I'm super proud of myself!

Day 24 was to recreate a Holiday Mani. My first and only choice for this one was IHaveACupcake's Christmas Nail Art on Youtube. You can view the tutorial here.


Polished Used: 
  1. Zoya's America
  2. Wet N Wild's Ebony Hates Chris
  3. Essence's Wanna Be My Sunshine
  4. Sally Hansen Insta-Dri Jumpin' Jade
  5. Orly's Prince Charming


ACNC Day 23: Rudolph

Hey everyone

I had so many plans for this mani, but I ended up not really using anything like I wanted. I did 2 reindeer and put red on one of the noses so it was Rudolph. Then I made Santa on the Thumb and elves on the index and pinky finger. It was a cute mani, my only problem was a forgot antlers. :)


Polishes Used:

  1. Zoya's America
  2. Color Club's Feelin' Groovy
  3. Pure Ice's Magic
  4. OPI's My Boyfriend Scales Walls
  5. Milani One Coat Glitter's Gold Glitz
  6. Wet N Wild's Ebony Hates Chris
  7. Essence;s Glamorous Life


ACNC Day 22: Fruitcake

Hey everyone

These nails... I was dreading doing fruitcake nails. I honestly am not even sure what Fruitcake looks like, I had to google it. I was completely at a loss so I decided to just do a drip mani. I started off by painting my nails with Pure Ice's Magic. Then I took OPI's My Boyfriend Scales Walls and placed dots all on my nails. Using the same color I then made the drips. Lastly I took Essence's Glamorous Life, Wanna Be Your Sunshine, and Trust in Fashion to make the "fruits". And with a little bit of Pure Ice's Silver Mercedes for the highlights, my nails were done. 


The frustrating part? I was dreading doing these nails and once I was done with them, I loved them so much I didn't want to take them off.

ACNC Day 21: Water Marble

Hey everyone

Day 21 was Water Marble. I actually did this exact design using the exact same colors 2 years ago. I used Pure Ice's Siren & Sally Hansen Xtreme Wear's Green With Envy. I haven't done a water marble in quite a long time, but it was required so... :) 


It was quite difficult at first. I was originally going to do black and gray since it was "The End of the World", but I became to frustrated. And just for fun here's my old water marble from forever ago.


Oh geez. My water marbling has thankfully improved. 


ACNC Day 20: Candy

Hey everyone

I was waiting on this day. I watch Robin Moses pretty regularly and saw the tutorial she did on a Candy Cane nail. The tutorial is here. I really enjoy chevron nails and I wanted to try to do some tiny nail art. I think for my first try at following a Robin Moses tutorial. 


The Red is Zoya's America. The Silver is Pure Ice's Silver Mercedes. The white is OPI's My Boyfriend Scales Walls. To make the gray for the 3D effect on the bow and cane I mixed Pure Ice's Kiss Me Here with OPI's MBSW.

ACNC Day 19: Ugly Christmas Sweater

Hey everyone

I did actually finish this challenge on time. Just via Instagram. It's so much easier to post photos then to write up a full post. Hence why I'm late. Sorry about that. Anyway, December 19th was Ugly Sweater Day. Everyone was doing the exact same nail art, so I had to do something different. I tried my hand at my first Aztec Print using the tutorial from JauntyJill on Youtube. You can watch the video here. Then I wanted to try Sugar Spins so I used the tutorial from XOXOAlexisLeigh on Youtube. You can watch the video here.


I was inspired by Bill Cosby's sweaters to be honest. I just happened to use Christmas like colors. Pure Ice's Kiss Me Here for the gray. Zoya's America for the red. And OPI's My Boyfriend Scales Walls for the white of course. :)

Tuesday, December 18, 2012

ACNC Day 18: Classic

Hey everyone

Today is a day 18 and it's Classic. This really took me a second to figure out what I wanted to do. Then I decided I wanted to do a half moon, but what kind? I didn't want to just do a plain one. So I looked through a folder of my favorite nails I've seen on the web. I then found The Nailasaurus' half moon she did for the Tadashi Shoji Nail Art Challenge. I knew I had to try them. It's very rare for me to see a stamped design and actually have the stamp these days. I still need the 2012 Bundle Monster collection. This mani features Bundle Monster Plate BM21 from their 2010 collection. Today I'm going to also show you step by step how to do this mani. I'm quite excited and I hope you are too!

Start off with your base coat. Then cut hole reinforcers in half. Put them on your fingers one at a time right above your cuticle line. I used OPI's My Boyfriend Scales Walls to cover anything that wasn't covered by the hole reinforcers. 


I then used Pure Ice's Celestial along with BM21 to stamp the design on my nails. Pure Ice is the go to polish when it comes to water marbling and stamping. I'm not sure what makes them so different from the bigger brands, but they are perfect for these techniques. I couldn't recommend them enough. And they are so cheap too! 


Once they stamp is done remove the hole reinforcers. This will give you a clean line. If you have any leakage from under the tape use a little bit of acetone and just wipe it away with a Q-Tip or brush.


Now you can leave it like this if you want. If you have longer nails you could even do this as a french manicure instead of a half moon mani. But I wanted to smooth everything out. So I then used a nail brush from my Bundle Monster nail brush collection and traced the line of the half moon with Celestial.

I'm quite in love with these nails. I know I've said that a bunch throughout this challenge, but I'm quite happy with myself. I haven't really done my nails a whole lot since I had my son, so I was worried I'd lost my touch. I think I'm only getting better. I hope I've done Sam justice and you guys like these! If you attempt this mani using my tutorial please send me the link to your nails, I'd love to see them! 

ACNC Day 17: Christmas Movie

Hey everyone

I'm past midnight, I'm behind! Oh well a few minutes is better than not at all. Day 17 was Inspired by a Christmas movie. I don't know if you remember, but when I did my lights I said the Grinch would be making a comeback. And comeback he did! I'm so pleased with how my Grinch turned out this time around. He's much more Grinch-like.


Now you may be asking yourself, "What is that other polish she's got on?" This just wouldn't be my blog if there wasn't shameless self promotion! The other polish I'm wearing is 2 coats "Pucker Up and Kiss It Whoville" by Tara's Nail Polish over 2 coats of Exotic Ocean by Sinful Colors. Pucker Up and Kiss It is a red, white, green, and black glitter polish in many shapes and sizes. When worn alone it has predominately clear base with a hint of green.

If you would like to purchase a bottle of "Pucker Up and Kiss It Whoville" you can at this link here. Just don't forget to use the code HAPPYHOLIDAYS for 15% off your entire order! 

Monday, December 17, 2012

ACNC Day 16: Christmas Song

Hey everyone

Today is Day 16 which is nails inspired by a Christmas song. I took this opportunity to one again self promote. :) Today I'm going to show you Thumpetty Thump Thump which is inspired by Frosty the Snowman.


This polish has a nude base making it more like a jelly polish. Inside are black, white, and orange glitter. There is also some orange micro glitter as well. I have on 2 coats. 

If you would like to purchase Thumpetty Thump Thump please visit this link. And make sure you use the coupon code HAPPYHOLIDAYS to receive 15% off your entire order. 

Saturday, December 15, 2012

ACNC Day 15: Cozy

Hey everyone

Today was day 15 and the challenge was Cozy. I was super confused on what to do. I didn't want to stuff like everyone else was doing. And then it hit me. It's Red Cup Season. Only the best time of the year for Starbucks. So I decided to do a mani based solely on the red cup design.


I'm so excited with how they turned out! They may not look exactly like the cups (I don't think anyone could draw the Starbucks Logo that small!) but you can tell what they are. I started off painting half of my nails with Zoya's America. Then I took my Art Deco Long Brush in White and drew the rim of the cup and then a triangle on top for the whip cream. I then took Julie G's Chic Cipro and drew in the caramel syrup. I used Revlon's Espresso for the Chocolate Syrup. Lastly I used Zoya's Veruschka for the Starbucks Logo. I really enjoyed these nails and hope you did too!

ACNC Day 14: Glitter

Hey everyone

Day 14 is glitter. Everyone and their brother has been obsessed with China Glaze's new Cirque du Soleil Collection. Me not so much. The problem? One of their polishes looks almost identical to one of my polishes. It's A Trap-eze by China Glaze and I Killed The Teen Dream by Tara's Nail Polish are both nude jelly polishes with rainbow hex glitter in many sizes. The difference between the polishes would be the amount of glitter. Mine isn't a huge glitter bomb. China Glaze's is a temperamental glitter bomb. I say temperamental because with all of the glitter in It's A Trap-eze there is major dragging if you aren't careful. Below I have comparison swatches both 2 thin coats. And I applied both polishes like normal, no special techniques for glitter bombs. 


See all that dragging? Most of the glitter goes to the tips of your nails. It's also not very shiny which is due to the dense glitter.


Next we have I Killed the Teen Dream. It's obviously not as glittery. It's not as milky and takes a thicker coat to get a milky base.


This photo shows off how shiny the polish is. 


I then used a nail wheel and swatched 3 coats. The bases are pretty much identical. The glitters are even almost the same. I like to tell myself that I was just ahead of the curve. :)


I do actually like It's A Trap-eze once I apply it "correctly". To achieve complete coverage without dragging or patches I recommend the dabbing method. This is where you get polish on the brush and dab in on your nails and smooth around to get the coverage you need. The only issue with doing this is that it's very thick and can take a while to dry. I ended up smugging my right hand pretty bad and had to start over on 3 nails due to the drying time. Once you do the dabbing method however?


Beautiful. It's built up to a grayish base at this point. It does feel a little strange due to the amount of glitter, but it's nothing a good top coat can't solve. Now for glitter I couldn't just leave it like that. I had to add some flair to it. So I used Sinful Colors' Blue By You and made drips. 


I've never done the drip design before and was quite pleased with my first try. I was completely inspired by Chalkboard Nails! Her drip mani was adorable. Sidenote: What is it with bright blue polishes having a weird smell? This one and a China Glaze polish I have smell awful!  

If you would like to purchase I Killed the Teen Dream please visit my Etsy shop here. And be sure to use HAPPYHOLIDAYS to recieve 15% off your entire order!

Friday, December 14, 2012

ACNC Day 13: Snow

Hey everyone

Day 13 is SNOW! I'm really excited for this one. I started off by painting my nails with OPI's My Boyfriend Scales Walls (Because I use it constantly, oh my goodness!). I used 2 coats to build up a strong base. Then I used Sinful Colors Cinderella in 3 coats to make a nice soft winter blue skyline. I took a makeup triangle sponge and did a soft gradient at the tip with MBSW. Using a dotter I made 2 snowmen on my thumb and one on my ring finger. I lastly used Art Deco in Black for the arms and Zoya's Reva for the scarf.


I took Essie's Matte About You and finished off the gradient on my index, middle, and pinky nails. I think these nails were very pretty and soft. Excellent for a quick winter mani on the go. 

Wednesday, December 12, 2012

ACNC Day 12: Family

Hey everyone

I'm actually posting on the correct day! I told you I'd get caught up eventually. I felt a little better so I decided to try drawing my day 12 challenge. I was originally going to do rings because it's my Dad and Step Mom's anniversary. But it's not the 5th day of Christmas so I decided not to. I decided to do nails supporting one of my favorite TV families. THE FLINTSTONES! I love the Flintstones, I used to watch them all the time when I was a kid. And I even liked the movies, strange I know. I wasn't sure what to do for the nails so I surfed the web and came across someone who did Fred, Wilma, Barney, Betty, and Dino. I knew that's exactly what I wanted to do. Most Flintstone nails are only of Fred and his shirt. I knew I  had to try to do everyone for it to be "Family Nails". So I recreated Lisa-Nails' design which is featured here.


I knew I was going to have a hard time lining the design so I took a page from Lisa's book and used a marker. She mentioned her smeared so I waited a while before lining mine. It sadly still smeared once I put a top coat on. So I only ended up putting it on Fred and Betty. So I probably should cut down a brush so I can use it as a liner for my cartoon designs. I didn't use a whole lot of polish for these. But I did use some.

Dino: Zoya in Charisma, Milani One Coat Glitter in Gold Glitz, and Sally Hansen Insta-Dri in Blue Away

Fred: Zoya in Paz, Sally Hansen Insta-Dri in Blue Away

Wilma: OPI in My Boyfriend Scales Walls

Betty: OPI in My Boyfriend Scales Walls and Sally Hansen Insta-Dri in Blue Away

Barney: Orly in Buried Alive

They all have a base of Sally Hansen Insta-Dri in Beige Blast and either a marker as the outline or an Art Deco Long Brush in black.

I hope you guys enjoyed them and I hope I did Lisa-Nails justice!

ACNC Day 11: Presents

Hey everyone

I'm starting to get sick so Day 11 wasn't very awesome. Day 11 was presents. So I went ultra simple. I painted my nails using Finger Paints' Romanticism Ruby. Then I used an Art Deco Long Brush in White to make a cross over it for the ribbon. 


I'm not pleased with this one at all. But I've made it 11 days without stopping, so I don't want to stop now with just a little sickness. 

ACNC Day 10: Lights

Hey everyone

Day 10 was a fun nail night for me. I ended up using 2 different brushes and a ton of nail polish to completely this design. Day 10 was lights. Sounds simple right? Not quite. I thought I'd complicate it by drawing the Grinch as well. I haven't really done a lot of drawing simply because I'm a terrible drawer. When I was a kid I wanted to be an artist, I just didn't realize that you had to have an artistic ability. I guess I have fulfilled my childhood dream of being an artist though, just on teeny tiny canvases. :)

So I started out by drawing my grinch out on my nail, I had to redo it twice. So after that I decided to use PackAPunchPolish's Nail Art Doodle Sheets. If you haven't check them out please do so here. She created these sheets for drawing up to 55 nail designs a page on. My printer went haywire and blew them up so I had a bit of a hard time drawing on them, but to no fault of PackAPunchPolish. It was all my damn printer's fault. Anyway here's my drawing:


I don't know if you can tell but I totally drew it out with a pink pen first and then colored it in with nail polish. I'm not sure why I thought that would translate well, but in the end it worked. My nails are quite tiny so I ended up not making the hat, plus it looked a little lame. 


Here's the final product! I loved my nails, I thought they were adorable. Took me forever to do them, but it was totally worth it. 


Here's a lovely instagram photo of all of my supplies I used. 

  1. Wet & Wild Megalast In Wet Cement
  2. OPI in My Boyfriend Scales Walls (it's under)
  3. Julep in Leah
  4. Essence Colour & Go in Be Your Sunshine
  5. Essense Colour & Go in Glamorous Life
  6. Art Deco Long Brush in Black
  7. Pure Ice in Silver Mercedes
  8. Pure Ice in Hot Tamale
  9. Essence Colour & Go in Trust in Fashion
  10. Sally Hansen Xtreme Wear in Blue Me Away
  11. 2 Bundle Monster Nail Art Brushes
  12. Bundle Monster Dotter
  13. Chip Ahoy Cookie Lid
  14. Paper Towels 
  15. Onyx Profession 100% Pure Acetone (not pictured)
  16. Q-Tip Precision Tip Q-Tips (not pictured) 

Wow! That was a lot for a manicure that I only wore for 1 day. Makes me sad thinking about it. But this won't be the last you see of the Grinch. I have plans to use him again in a mani coming up. Also feel free to follow me on Instagram @Tara825c. Be aware though, I post a lot of pictures of my son as well. He's too cute not to. :D

ACNC Day 9: Pine

Hey everyone

Day 9 was Pine. After completely my Starry Night I was in need of a easier manicure. I've done something similar to this before, but to be honest I was almost midnight when I posted this so I needed something fast and easy. 


I started off with 2 coats of Pure Ice's Silver Mercedes. I then did an open half moon mani with Zoya's Veruschka. Lastly I used Zoya's Reva and did little ornaments hiding in the pine. I very quick and easy mani using 3 polishes and a dotter for the ornaments. A nice beginner's mani.

ACNC Day 8: Starry Night

Hey everyone

Day 8 was Starry Night and it was easily the one I was most excited about doing. Way back when I attempted a Starry Night mani and once I realized how tough it was I only did it on my thumb and then quickly removed them because I didn't like it. Fast forward 2 years and I'd never attempted it again. I love the painting and new this would be the time to retry and earn my title back as a nail artist. Freelance of course but who's getting technical? 


I started off with a base of Orly's Sweet Peacock. Then used Sally Hansen Insta-Dri for the swirl. I accented the swirl using OPI's My Boyfriend Scales Walls and Orly's Mysterious Curse. I used Essence Be Your Sunshine for the stars. I did a tip with my Art Deco Brush and added a top coat. The other nails I used Blue Away and Milani's 3D Holographic in Cyberspace for give it that extra shine. I was so pleased with this manicure. Sadly it was my day off so I didn't get to show it off like I wanted. I do have plans to redo the design on nails for sale in my Etsy shop, so be on the look for those soon!

And just for fun here's 2 years ago's design. Hope you're as pleased with my progress as I am. 


ACNC Day 7: Ornaments

Hey everyone

I've gotta say I miss color coding all of the days. Now we get to the fun parts, actual nail art! Day 7 was Ornaments. I was inspired by a design I saw on Tumblr. I can't remember the exact design now, I should have bookmarked it so I could credit them. It was ornament balls but the balls were at the tips. I have little nubbins right now so I decided to turn them into half moon manis!


I started off with taping my nails with hole reenforcers. Then I did 2 coats of Julie G's Chic Cipro which I have featured here.Then I went back in and carefully filled in the nude area with different colors. The above picture shows Zoya's Trixie, I will be going back and doing a complete mani of this design, I adore it so much! 


On my thumb I used Zoya's America. On my index I used Zoya's Ibiza. On my middle I used China Glaze's Lemon Fizz. On my ring I used Zoya's Trixie, and on my pinky I used Sally Hansen Insta-Dri's Jumpin Jade. I love how half moon and french manicures always make my little nubbins look longer. 


I then used a long brush from my Bundle Monster nail brush set (that you can purchase here. It comes in a fantastic carrying case and has dotters!) with OPI's MBSW and made the top of the ornament. Lastly using a black striper I made the tread. Slap on a top coat and you are done! I loved how these turned out and I got quite a few complements as well.


ACNC Day 6: WHITE

Hey everyone

Day 6 of the Advent Calendar Nail Challenge was WHITE. I do have the perfect white polish in my shop so yet again we have shameless self promotion from me. Aren't you excited? I know I am!


I started off this mani with 2 coats of OPI's My Boyfriend Scales Walls. This polish is sooooo pretty. In the bottle I swear it looks gray but on the nail it's a beautiful bright white. I'm going to have to buy more of it, I keep using it for all of my white based manis. On my thumb and ring finger I put 2 coats of Won't You Guide My Sleigh Tonight by Tara's Nail Art aka Me! It's a dusty white color which MBSW goes perfect with if I do say so myself. There are white and red glitters in the polish as well. This was the first polish I made for my Christmas collection. I'm quite pleased with it. I finished the entire mani off with 2 coats of Essie's Matte About You. MYSW is just dreamy as a matte polish. 

If you would like to purchase Won't You Guide My Sleigh Tonight or any of my other polish please visit my Etsy at this link <click me>.

ACNC Day 5: BLUE

Hey everyone

Day 5 for the Advent Calendar Nail Challenge was BLUE. I have recently released my Christmas Collection on Etsy. One of the polishes I made was I'm Mr White Christmas inspired by the Year Without Santa Claus. It's a glitter polish with blue and white matte glitter with some small halo glitter. There's almost some medium sized blue, purple, and silver hex glitter. Basically it's a blue glitter bomb. I couldn't resist showing it off for Blue Day.


Above we have 2 coats on my index, middle, and pinky. There is one coat over Orly's Sweet Peacock (2 coats). Sweet Peacock is a fantastic blue foil polish. I bought the bird collection from Sally's Beauty forever ago and when I didn't like Fowl Play I decided to not use any of the collection. Stupid I know, but I was badly burned by that flaky polish. I regret it now obviously! I've got to try stamping with is soon, I'm just so curious. 

If you would like to purchase I'm Mr White Christmas or any of my other polish please visit my Etsy at this link <click me>. And yes I took a picture in my kitchen, don't judge me! It was late and the kitchen has the best lighting. :D

ACNC Day 4: SILVER

Hey everyone

Day 4 for the Advent Calendar Nail Challenge was SILVER. I painted my nails with a base of Sally Hansen Insta-Dri Wined Up. Then using Sinful Colors Silver Mercedes. I did a stamp design. Seriously Silver Mercedes is probably the best stamp polish I've used. I don't actually own polish made specifically for stamping.


This is probably one of my favorite stamps. I use it often with lighter colors for a subtle stamp. This is Bundle Monster Plate BM19 from their 2010 line of stamping plates. As you can see the plate is a little small for my thumbs but worked on all the other nails. 

ACNC Day 3: GREEN

Hey everyone

I know I'm like super behind on posting. I'm going to make sure to get all these out today. So if you have me on an alert of some sort I do apologize ahead of time. :D

Anyway. On the 3rd the challenge was to do GREEN nails. I was going to do trees or wreths but pine is coming up so I didn't. Instead I pulled out one of my VHTF polishes. China Glaze's L8R G8R. I used 3 coats on all of my nails. And then I used another HTF polish, Sinful Colors' Green Ocean.


Look at that shiny halo goodness. I like that you could still see the halo on the ring finger as well. I also found it interesting how the base turned a yellow-green shade with Green Ocean on top. 

Monday, December 3, 2012

ACNC Day 2: GOLD

Hey everyone

Today is day 2 and the color is GOLD! I started off with 3 coats of Wet N Wild in Hannah Pinktana. It is a gorgeous pink with a scattered halo. 


It is on the sheer side but has a wonderful build up. There is a lot of glitter so it dries somewhat grainy.


I then added an accent nail of Milani One Coat Glitter in Gold Glitz on my ring finger. I added a coat of Tara's Nail Polish in I Ain't Saying She's A Gold Digger. 


And lastly topped it all off with Essie's Matte About You.


This mani is so pretty. And its perfectly delicate for the office and glitzy enough for the night. I'm so happy with how this turned out.


Saturday, December 1, 2012

ACNC Day 1: RED

Hey everyone

It's December 1st so that means it's Day One of the Advent Calendar Nail Challenge. Today's challenge is RED. I've recently become obsessed with Chevron print so I couldn't resist.


On my thumb, index, and pinky finger we have Milani One Coat Glitter in Red Sparkle. On my middle and ring finger we have Sally Hansen Insta-Dri in Petal Pusher. I drew the chevron print on with Sally Hansen Nail Art Pen in red. Then I finished the look with Essie in Matte About You. 

I'm completely pleased with these. They are wonderfully sparkly and pretty. Reminds me of twinkles on a tree so it totally works with Christmas. I hope you all enjoyed them. And if you participated leave a comment and show me your work!

Advent Calendar Nail Challenge

Hey everyone,

Happy Hands Nail Polish recently started an Advent Calendar Nail Challenge. This will last from now until Christmas Eve. I'm super excited and hope that I'll be able to do this one. I rarely keep up with these daily challenges, but one of my New Years Resolutions is going to be to work on my blog more. So here's my first test before the new year!


Wish me luck!

Sunday, November 25, 2012

Sinful Colors Leap Flog

Hey everyone,

I have another Sinful Colors polish today. It's called Leap Flog. This polish came out a while back and recent re-released. Luckily I was able to grab a bottle before it went back into the Nail Polish Vault. 


Isn't it pretty? It applies like a dream. 2 super easy to apply coats with a brilliant shine. You can't ask for much more with nail polish. It's a gray blue color and to be honest I expected it to lean more towards green with the name. Leap Flog. Is it supposed to be Leap Frog? Not sure. Either way I love it.


Leap Flog is not part of the store collection so you'll have to look for it in Special Edition displays. I cannot for the life of me remember which display I got this from. It's been a good 3 months since I swatched. Bad blogger. :P 


Monday, November 12, 2012

Sinful Colors Vacation Time

Hey everyone,

The polish I have for you today is called Vacation Time and it's by Sinful Colors. To be honest when I first saw this polish I thought it looked kind of grandma-ish. Not sure why just something made me think that. So I put it back on the shelf. And part of my routine at Walgreens is circling the nail polish twice just in case I see something else I might want. On my second go around I saw this polish again and thought, what the heck. Let's buy it.


I honestly couldn't be more pleased. This polish is so pretty. It's a smooth dusty rose shade that I just adore. The formula was a dream. And it's completely covered in 2 coats. 


This polish goes so good with my skin tone. My skin is naturally the color of paper, this polish makes this look almost tannish. Success!

Friday, November 9, 2012

Mer-Maid For Each Other by Nicole by OPI

Hey everyone,

The week this polish came out there was actually a coupon in my local paper for Nicole by OPI giving me $1.50 off any bottle. I never purchased Peridot by Chanel or it's many dupes, but I did buy Mer-Maid For Each Other and was pleasantly surprised. 


There is nothing that frustrates me more, than when I buy a Duo-Chrome and expect a spectacular finish, to only have it be so thin that you can't tell it ever changed colors. Thank goodness I didn't have to worry about that at all with Mer-Maid for Each Other. This polish was perfect. I love the way it changes colors and the metallic finish. It was exactly what I expected and then some.


This last photo especially shows off how the polish shifts from green to blue. 

Now this polish isn't a dupe at all for Peridot, that would be Just Spotted By the Lizard by OPI. This polish is Green to Blue where Peridot and JSBL both shift green to gold. Mer-Maid for Each Other is the perfect for anyone who loves Duo-Chromes, especially green ones.